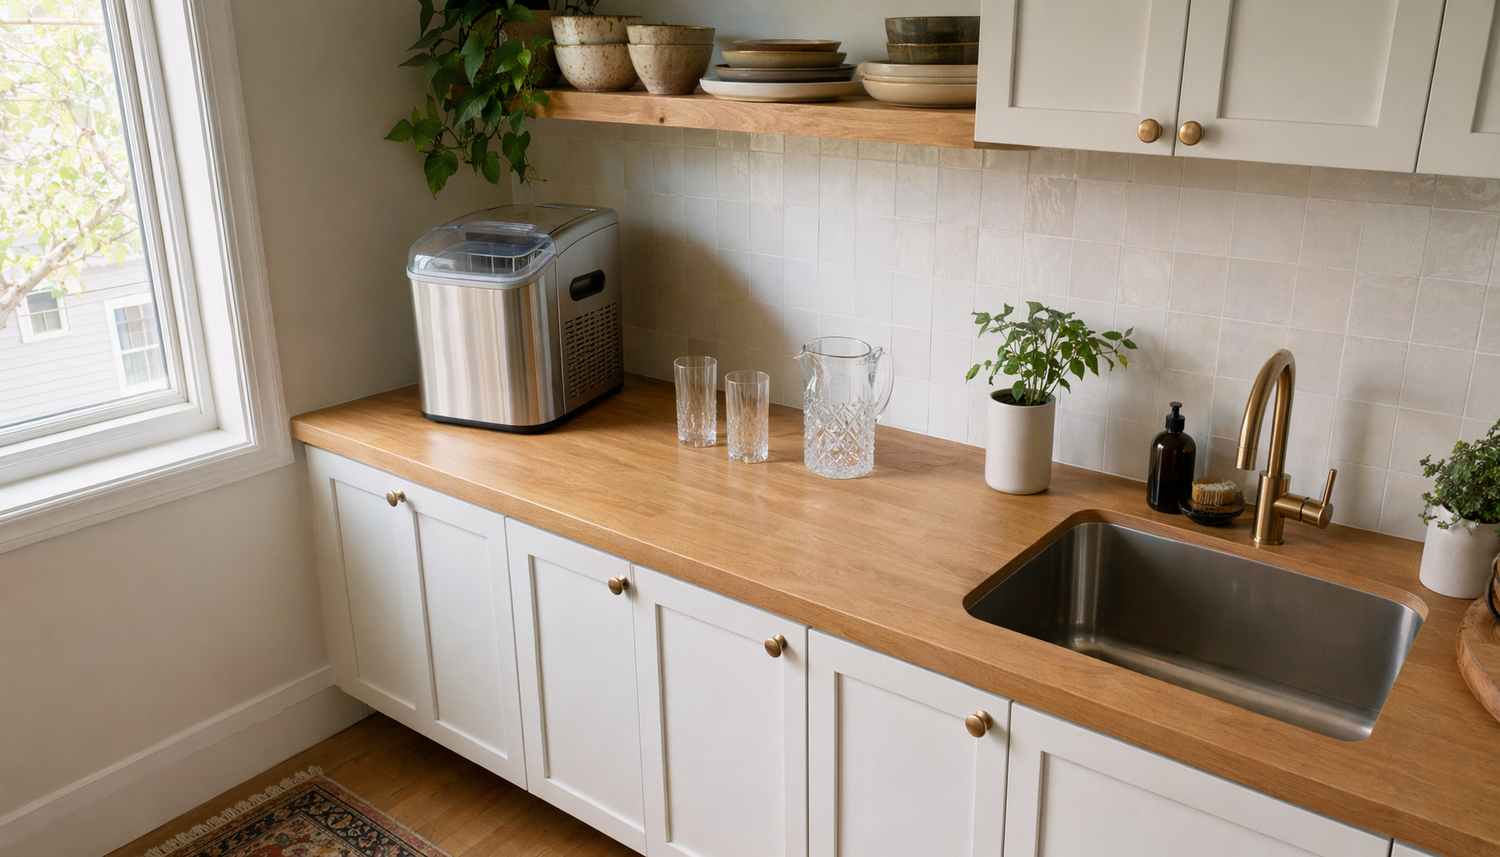
Place an ice maker close enough to the sink for easy refills and cleanup, but offset enough to protect your dry landing area, outlet access, and everyday prep flow. The best sink-side layouts keep the machine nearby without letting it take over the counter.
If your ice maker keeps turning the sink into a traffic jam, the problem is usually not the machine alone. A few inches of misplaced appliance width can force every refill, rinse, and garnish task into the same tight strip of counter. The fix is to match the placement to how you actually use the sink, what type of ice maker you own, and how permanent the setup needs to be.
Assess the Sink Run Before You Pick a Spot

Map the wet zone first
Before choosing the left or right side of the sink, think through the full wet path: where you fill water, rinse the scoop, empty meltwater, and set down anything damp. Food equipment standards treat sinks, counters, shelves, and related surfaces as part of one working system, and that is a useful way to plan a home kitchen or bar as well. If the ice maker blocks the only dry landing area beside the bowl, the counter will feel cramped even when the appliance technically fits.
In most homes, the least stressful position is beside the sink rather than directly behind the faucet or centered on the main prep strip. Leave one uninterrupted area open for a cutting board, coffee setup, snack tray, or cocktail garnish work. In a home bar, that same dry zone becomes the place where glasses, napkins, and mixers can sit without getting splashed.
Choose the side that supports your dominant task
If you prep food on the right side of the sink, place the ice maker on the left. If the left side is where you build drinks, reverse it. The point is to keep one hand free to use the sink while the other can reach the lid, basket, or scoop without crossing over knives, dish racks, or glassware.
This small offset also improves the look of the counter. When the sink stays visually open, the room feels more balanced, which matters in apartments, basement bars, and compact entertaining zones where every appliance is in plain sight.
Choose Placement by Ice Maker Type

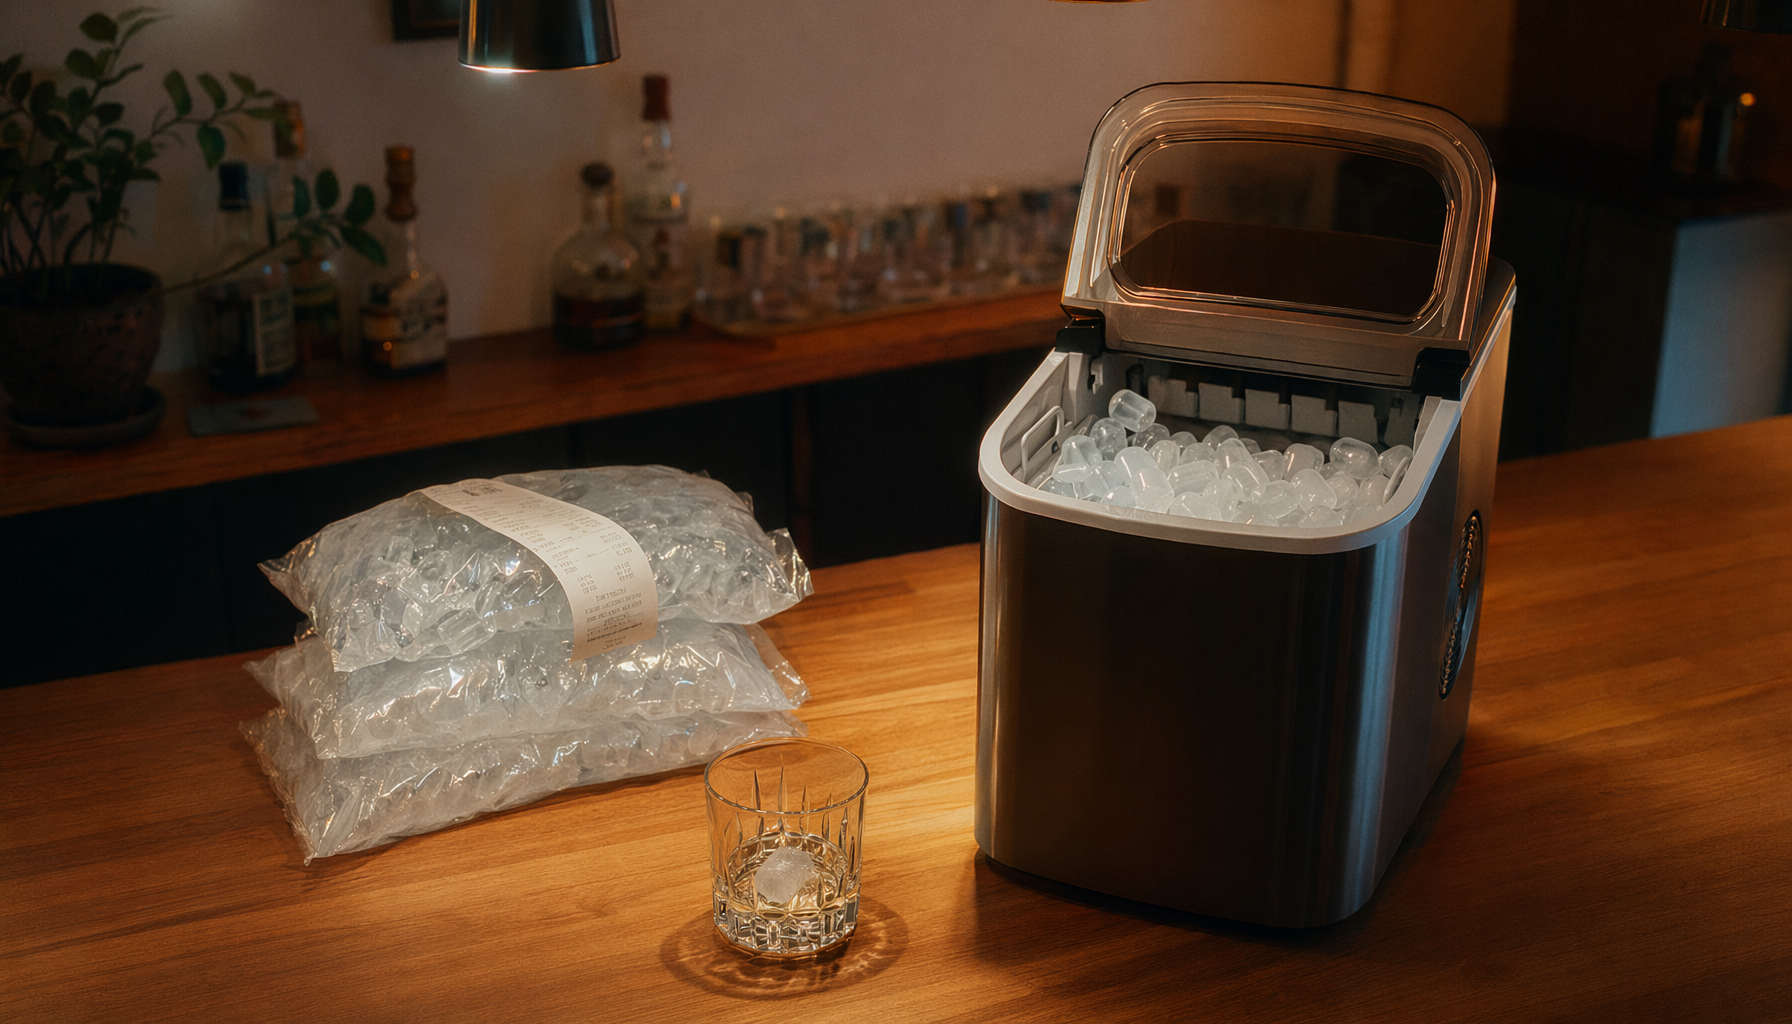
Countertop models need refill room
Countertop ice makers are easiest to live with when the reservoir, lid, and basket are easy to reach. In typical home use, compact models often produce about 26 to 35 lb of ice in 24 hours, with first ice commonly ready in about 6 to 15 minutes depending on the style. That makes them practical for everyday drinks, weekend hosting, or a small office beverage station, but only if refilling and unloading the basket do not interfere with the sink itself.
For that reason, a countertop unit usually works best at the end of the sink run, on a short return counter, or on a sturdy side cart tucked near the sink cabinet. Placing it directly between the bowl and your main work area turns quick tasks into repeated stop-and-start motions, especially when you are also washing produce, making coffee, or mixing drinks.
Built-in and undercounter units need utility planning
Built-in models change the layout rules because they are plumbed appliances, not just portable countertop helpers. Automatic ice making equipment falls under a relevant equipment standard, while undercounter refrigerators and beverage coolers are covered under another relevant equipment standard, which is a useful reminder that drainage, material safety, and service access matter along with capacity. If your daily demand points you toward an undercounter machine that makes roughly 80 to 199 lb per day and stores 24 to 34 lb in the bin, give it its own cabinet bay instead of forcing it into the sink base zone.
For design-friendly refrigeration planning, keep the sink cabinet focused on water tasks and place adjacent cold storage one step away. An undercounter beverage cooler or wine cooler can sit next to the ice maker, but stacking both directly into the sink area often makes the whole wall feel busy and leaves too little room for normal prep.
Respect Power, Airflow, and Drain Paths

Keep electricity out of the splash path
Portable cord-and-plug equipment must be protected from damage and removed from service when defective. In wet locations, grounding and safe hand contact matter as well. In practical terms, do not drape the cord across the sink edge, do not hide the plug where splash can collect, and do not build a routine that requires unplugging the unit with wet hands after cleanup.
This is also where outlet location matters more than many people expect. A sink-side ice maker is easier to use when the cord runs in a short, direct path to the receptacle instead of wrapping behind the faucet, crossing a dish rack, or hanging below the counter where it can be tugged or pinched.
Leave breathing room and a real drain plan
Countertop units still need airflow, so avoid pressing them tight against a backsplash or wedging them between a tall coffee machine and a drying rack if the vents are on the side or rear. Built-in units need even more discipline: follow the installation instructions for leveling, ventilation, drain routing, and service access before the cabinetry is finalized.
Drainage deserves the same attention as airflow. Countertop machines still need a convenient place to empty the reservoir or cleaning water, while undercounter models usually need a dedicated drain strategy from the start. If you are adding a filter head, tubing, or water-line accessories, checking drinking water system components helps keep the installation grounded in recognized component standards instead of improvised fittings that are hard to service later.
Space-Saving Layouts for Small Kitchens and Home Bars

Offset the machine instead of centering it
In small kitchens, the most common mistake is centering the ice maker in the most obvious spot, which is usually the spot you need most for prep. Shifting the unit to one side keeps the faucet usable, preserves room for a cutting board or tray, and makes the counter look intentional rather than crowded.
This is especially effective in home bars where the sink run is short. Let the sink handle rinsing and water access, then keep the machine slightly off to one side so the middle stays open for glasses, bottles, and quick drink assembly.
Use a secondary surface for peak-demand ice
A slim rolling cart, microwave shelf, or sturdy side table often works better than sacrificing the only prep counter. This is a strong option for portable bullet or nugget ice makers that refill from a reservoir, because the sink can stay close for filling and draining while the machine itself stops competing with coffee prep, dishwashing, and snack assembly.
If the room already has a beverage cooler, wine cooler, or portable car refrigerator for overflow, do not force every cold appliance into the sink zone. Split the setup by task: keep the refill-dependent ice maker nearest the sink, move grab-and-go cans and bottles to the cooler, and store occasional-use travel refrigeration on another wall or in a pantry when it is not in service.
Make the Setup Easy to Clean and Easy to Live With

Plan for cleaning access, not just placement day
Cleaning and sanitizing are separate steps, and sink-side appliances are easier to maintain when you can reach around the sides, open the lid fully, and empty or rinse the reservoir without twisting the machine out of place. A setup that looks tidy on day one becomes frustrating quickly if you have to drag the unit forward every time you wipe underneath it.
For everyday home use, that usually means leaving enough room to dry the surrounding surface, store the scoop cleanly, and keep damp towels or bar rags from piling up against the machine. A little space around the base often matters more than squeezing the unit into the absolute closest spot to the faucet.
Keep the refrigeration wall visually calm
Good-looking placement usually follows good workflow. Align the ice maker with a cabinet edge, keep the scoop and extra accessories in one tray or drawer, and avoid mixing dish soap, syrups, sponges, and glassware in the same narrow strip of counter. When the sink remains visually open, even a compact kitchen or basement beverage station feels larger and easier to use.
For more permanent home bars, office refreshment areas, or light-business beverage counters, certified food equipment listings give you a practical way to verify listed categories for ice makers and nearby refrigeration. If you are also adding filtration, drinking water treatment units can help you review certified filter options before the setup becomes harder to change.
FAQ
Q: How close should a portable ice maker be to the sink? A: Close enough that refilling and draining are easy, but not so close that splash reaches the controls or the machine blocks the only dry landing area. In most kitchens, “next to the sink” works better than “in front of the sink.”
Q: Is a countertop or undercounter unit better for a small kitchen? A: Countertop models usually make more sense in apartments and compact homes because they do not require a dedicated water line or drain. Undercounter units free the counter and make more ice, but they only pay off when you already have the cabinet space, plumbing path, and ventilation room to support them.
Q: What if I also want a beverage cooler or wine cooler nearby? A: Put the appliance that depends on the sink most often closest to the sink. That is usually the ice maker, while a beverage cooler or wine cooler can sit one bay over or on an adjacent wall so the prep zone stays usable.
Final Takeaway
The most effective sink-side ice maker layout is usually offset, not centered. Keep one dry prep strip open, give the machine a short and safe path to water and power, and match the placement to whether the unit is portable, built in, or part of a larger refrigeration plan. When the sink stays usable on its own, the whole kitchen or bar works better and looks less crowded.

Dejar un comentario
Este sitio está protegido por hCaptcha y se aplican la Política de privacidad de hCaptcha y los Términos del servicio.