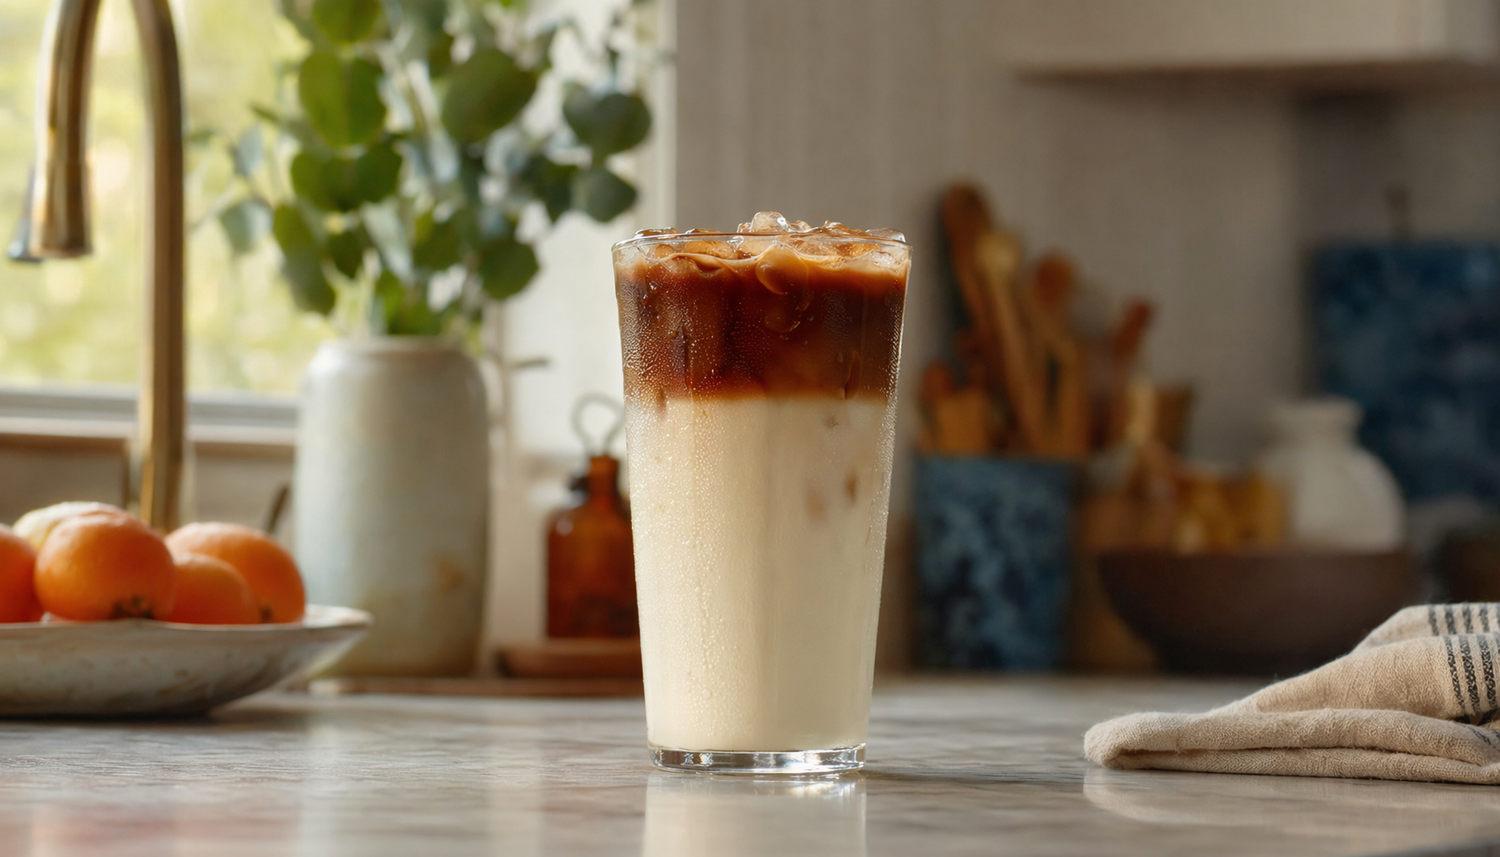
A clean layered iced latte depends on three things working together: tightly packed ice, cold milk, and a slow coffee pour. If one of those is off, the layers usually blur within seconds.
If your espresso always streaks straight into the milk, the problem is usually not the recipe but the structure of the drink. In home kitchens, RV setups, and small office coffee stations, a more stable layer is realistic when the ice is firm, the milk is cold, and the pour is controlled. The sections below break down what actually changes the result and how to repeat it without wasting coffee or watering down the drink.
Why Some Iced Lattes Mix Immediately

Ice Is the Barrier, Not Just the Chiller
A firmly packed layer of ice between milk and coffee does two jobs at once: it cushions the pour and gives the espresso a temporary surface to rest on. When the glass only has a few cubes floating loosely on top, the coffee slips through the gaps and pulls the layers together almost right away.
That is why layered drinks usually look better in a tall, narrow glass than in a short, wide one. The narrower shape keeps the ice closer together, so you need less total ice to build a stable barrier. For a typical home iced latte, the best visual result comes when the ice rises above the milk line instead of sitting level with it.
Temperature and Density Both Matter
A traditional layered iced latte is easier to build when hot espresso meets cold milk, because the temperature contrast helps the espresso stay distinct for a moment longer. That does not mean the shot should be left steaming for several minutes. It means you want the milk and glass cold enough that the espresso lands on a chilled structure instead of immediately melting its way downward.
Density also matters. Whole milk usually behaves more predictably than thinner options because it gives the espresso more resistance. If you are using cold brew or another fully chilled coffee base, you lose that hot-over-cold advantage, so layering becomes harder and technique matters more.
Which Ice Works Best for a Layered Iced Latte

Dense Ice Usually Gives the Cleanest Line
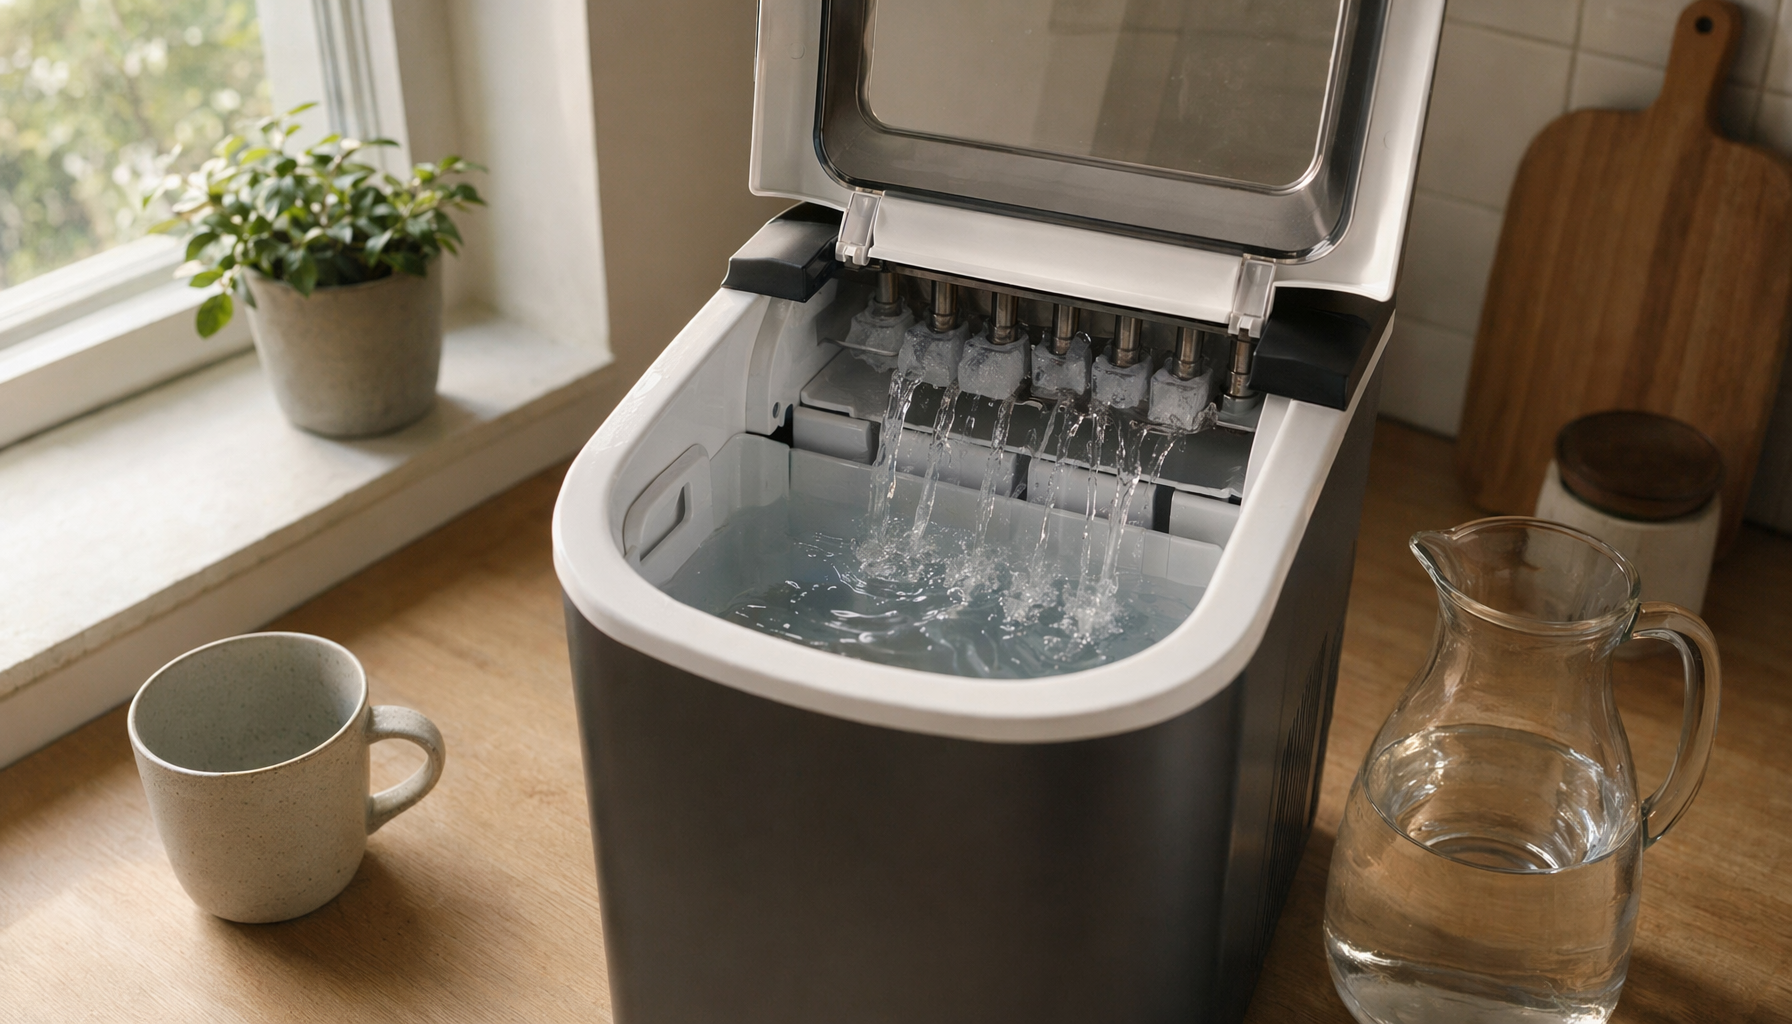
For a sharp visual split between milk and coffee, the most practical choice is a solid cube, crescent, or similarly dense piece of ice. Portable ice makers come in nugget, bullet, sphere, crescent, and cube styles, but not every shape supports the same result. A layered latte benefits from ice that stays firm, sits close together, and does not collapse into gaps as fast.
Large, denser pieces also help control dilution. That matters because once the top layer starts melting quickly, espresso gets thinner, the milk warms, and the visual separation breaks down faster. In a warm kitchen or on a brunch counter, better ice often makes a bigger difference than changing beans or milk.
Ice Type Trade-Offs for Different Drinks
Ice type |
How it behaves in a layered latte |
Better use cases |
Cube or crescent |
Best for a clean, stable separation and slower dilution |
Iced lattes, iced coffee, mocktails, party punch |
Bullet ice |
Practical and fast-chilling, but can leave more open space than tightly packed cubes |
Everyday iced coffee, travel use, office drink stations |
Nugget ice |
Pleasant to sip and good for cold brew, but softer pieces make a crisp layer harder to hold |
Cold brew, sodas, smoothies, casual coffee drinks |
Sphere ice |
Melts slowly, but the shape is too large for most latte glasses |
Whiskey drinks, bourbon, craft cocktails |
This is where appliance choice becomes practical. If your main goal is layered coffee, choose an ice setup that can give you firm, repeatable pieces for a tall glass. If your household also makes cold brew, cocktails, or party punch, a second ice style may be more useful overall than trying to force one shape into every drink.
A Step-by-Step Method That Works at Home

Use a Simple Ratio First
Start with a 12 to 16 fl oz clear glass so you can actually see the layers and judge the result. Add about 4 to 5 fl oz of cold milk, then fill the glass with ice until the ice rises clearly above the milk surface. Brew a double shot of espresso, or use a small, strong coffee portion if espresso is not available.
For most home setups, the easiest starting point is: 1. 4 to 5 fl oz cold milk 2. Ice packed above the milk line 3. 1 double shot of espresso 4. Optional sweetener in the milk, not in the coffee
This works because it keeps the coffee portion small enough to sit on top while giving the ice enough structure to slow the pour. If you use a large mug with only a handful of ice, the same ingredients will mix far more quickly.
Pour Slowly and Use the Ice to Break the Fall
Pour the milk first, then the ice, then the espresso. Aim the espresso onto the ice rather than into an open pocket of milk. If you want even cleaner separation, pour over the back of a spoon so the liquid spreads before it drops.
Wait only briefly after pulling the shot. A little cooling is useful because it reduces instant melt, but fully chilled coffee is not always easier to layer. With espresso, you are using a balance: warm enough to stay visually distinct, but not so hot that it destroys the ice barrier on contact.
Keep Dilution Under Control
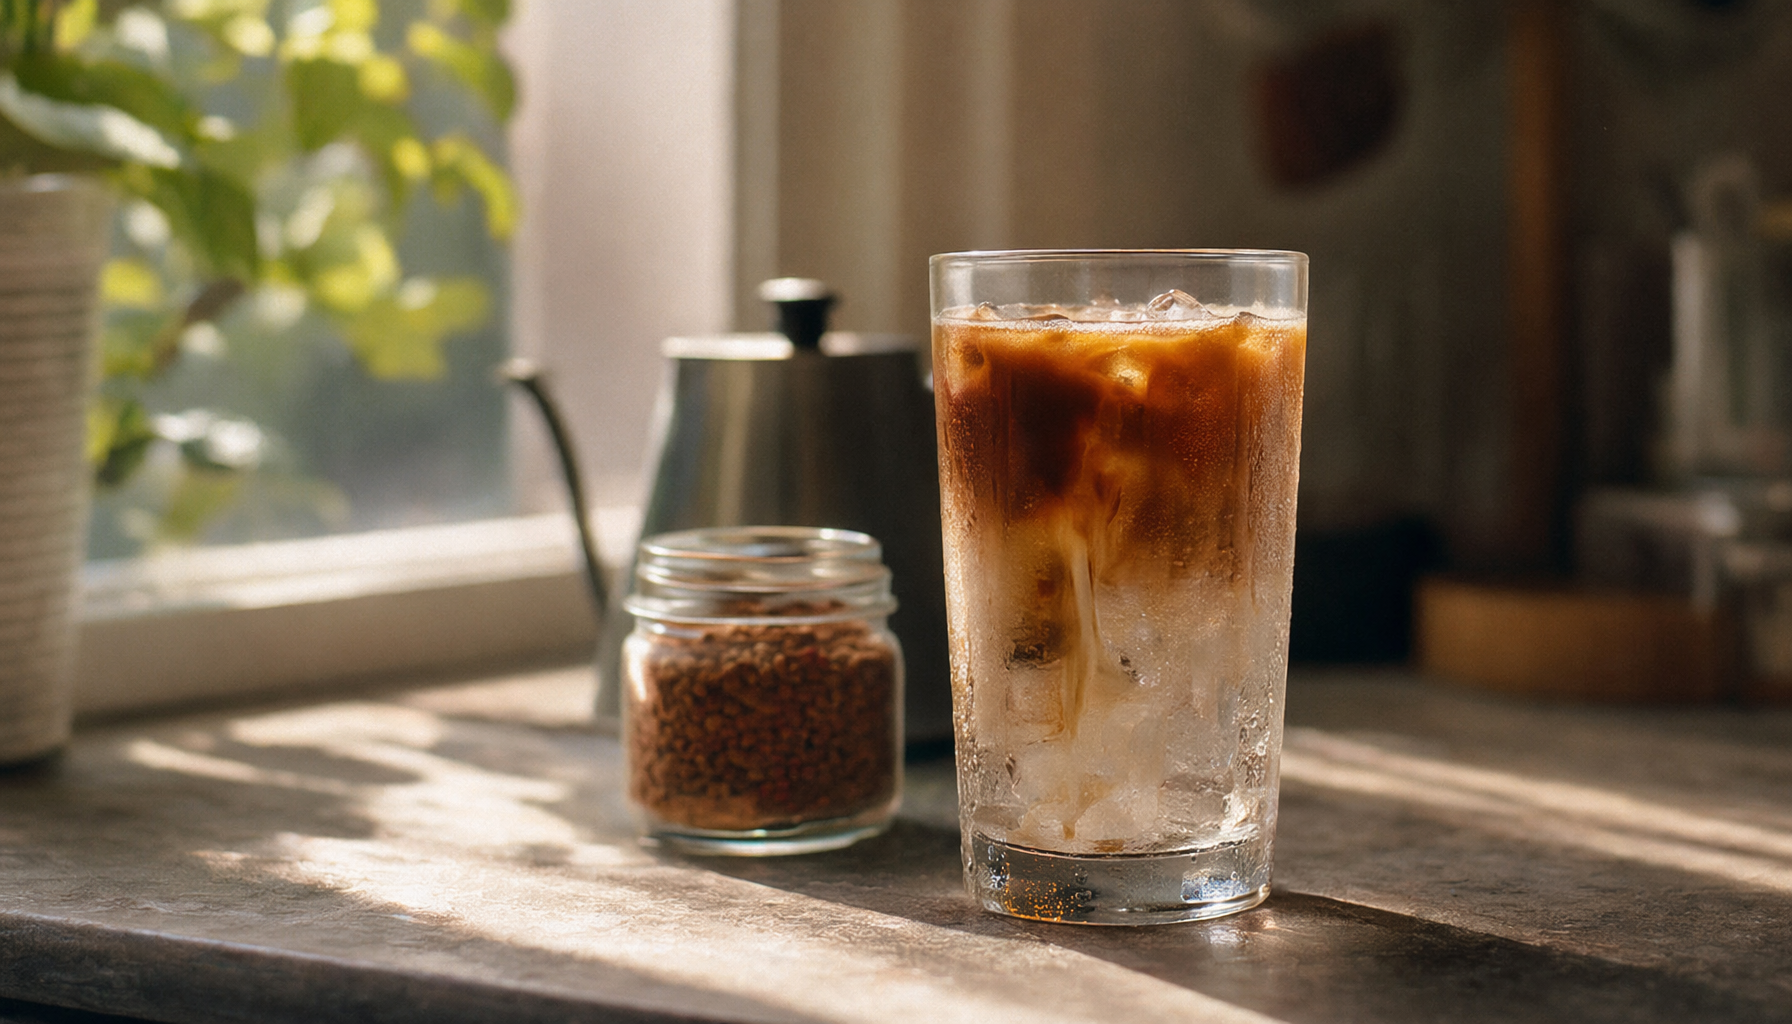
An older iced coffee method that cools brewed coffee before serving and uses coffee cubes to reduce dilution is still useful if you make layered drinks often. Coffee cubes are especially practical when you want to chill espresso or brewed coffee faster without adding extra water to the drink.
That approach is helpful beyond lattes. If you keep coffee cubes in the freezer, you can use them in cold brew, blended coffee drinks, and even dessert-style mocktails where a watery finish is a bigger problem than a slightly softer layer.
How Cooling Appliances Improve the Result

Colder Ingredients Give You More Margin for Error
A layered latte is easier to repeat when the milk is already cold, the glass is chilled, and the ice is dry and freshly made. In practice, that means a refrigerator, beverage cooler, or wine-and-beverage unit can be just as important as the coffee machine. When milk starts colder, less of the espresso’s heat goes into warming the base, and the layer usually stays cleaner for longer.
This is also one of the easiest upgrades for households that make several iced drinks each day. If the same cooler is holding milk for iced lattes, mixers for mocktails, and bottles for weekend cocktails, it becomes easier to serve every drink over colder ingredients instead of relying on a last-minute handful of wet freezer ice.
Matching the Appliance to the Use Case
Countertop and portable ice makers make the biggest difference when you need fresh ice on demand instead of whatever shape your freezer happened to leave behind. That matters for home coffee bars, but also for RV travel, vacation cabins, boat use, and light-business setups such as a small waiting room drink station or a weekend dessert counter.
For heavier use, some small-business-oriented units are rated for up to 45 lb of ice per day under ideal conditions, which is relevant if you are serving iced coffee alongside smoothies, party punch, or whiskey drinks at the same event. The practical takeaway is simple: choose your appliance around the drinks you actually make most often, not just the fastest batch time on a product page.
Troubleshooting Common Layering Problems

When Cold Brew Keeps Sinking
Cold brew, coffee concentrate, and cold-mixed instant coffee are harder to layer because they do not have the same hot-over-cold advantage as espresso. If the coffee sinks no matter how slowly you pour, sweeten the milk first. That increases the density of the bottom layer and gives the coffee a better chance to sit above it.
This is especially useful with thinner milks. Skim milk and lighter non-dairy options usually need more help than whole milk because they offer less structure. If you want the layered look with a chilled coffee base, start with a smaller coffee portion and a sweeter, colder milk base before trying to increase drink size.
When the Drink Gets Watery Too Fast
Watery layered lattes usually come from one of three issues: small wet ice, overly hot coffee, or too much time between building and serving. Dense, dry ice slows dilution better than thin shards, and a chilled glass buys you a little more time before the drink starts collapsing.
If you are serving more than one drink, set up the station first. Keep milk cold, line up the glasses, make sure the ice basket is full, and pull espresso last. That workflow is useful at home and even more useful in light-business situations where a delay of a minute or two can noticeably change the look of the drink.
FAQ
Q: Why does my espresso disappear into the milk even when I use a lot of ice? A: The amount of ice matters less than the way it is packed. If the cubes are small, wet, or floating with gaps between them, the espresso finds a path through the openings and mixes immediately.
Q: Can nugget ice work for a layered iced latte? A: Yes, but it usually gives a softer, less defined layer than cube or crescent ice. Nugget ice is excellent for sipping, cold brew, and many mocktails, but it is not the easiest choice for a crisp striped latte.
Q: Does chilling the glass really make a visible difference? A: Usually yes, especially in warm kitchens or during summer service. A chilled glass slows melt at the edges, helps the milk stay colder, and gives you a slightly longer window before the layers blur.
Final Takeaway
If you want milk and coffee to stay separated, build the drink around structure instead of treating layering like a coffee trick. Use a tall glass, pack the ice above the milk line, keep the milk very cold, and pour the espresso slowly onto the ice or over a spoon.
For most homes, the best appliance support is simple: reliable fresh ice and colder ingredient storage. That same setup also pays off beyond layered lattes, whether you are making cold brew, smoothies, whiskey drinks, cocktails, mocktails, or a batch of party punch that needs ice quality to hold up instead of disappear.
Laisser un commentaire
Ce site est protégé par hCaptcha, et la Politique de confidentialité et les Conditions de service de hCaptcha s’appliquent.